Sunday, August 28, 2011


Many thanks to the guys at Acme Auto Parts in Enfield, CT, who actually had wiper arms for the '60 in stock.  This not only saved me from having to wait a week for a delivery from an online parts company and paying a shipping fee, but also allowed the truck to be equipped with wipers in time to drive to work during Hurricane Irene.

Thursday, August 25, 2011

How to Replace The Driver's Side Wiper Pivot on a 1960 F100

When I bought my truck, it had no wipers. I soon found that the wiper pivots were both broken - someone once upon a time had removed the wiper arms carelessly enough to pull the splines from the pivots.  Reproduction pivots with splines attached are widely available for about $40 each from various catalogs, but I was able to find a NOS pivot, still in the Ford parts room envelope, for $18 on eBay.  I couldn't seem to find any installation instructions, though - not even in the Ford service manual - so for those of you who are new to this stuff like I am, here's how to replace the pivot on the driver's side.  (When I get another pivot, I'll show how to do the one on the passenger side.)

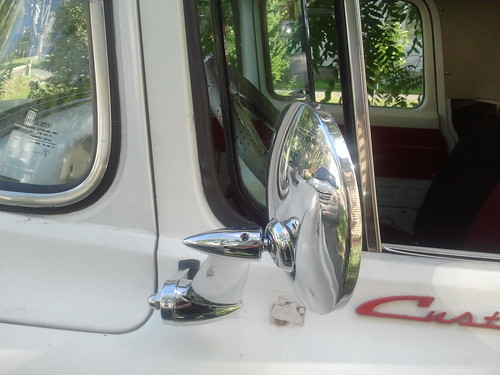
First, remove the retaining nut and bezel from the pivot on the outside of the truck.  The pivot, no longer held in by the retaining nut, will drop into the cab behind the instrument panel, which needs to be removed to give you access to the pivot.


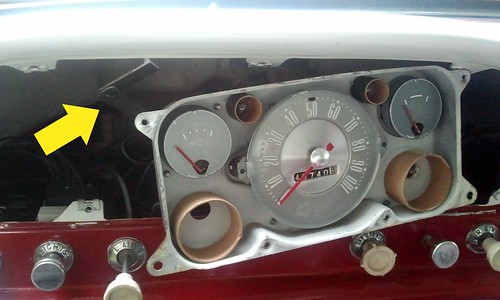
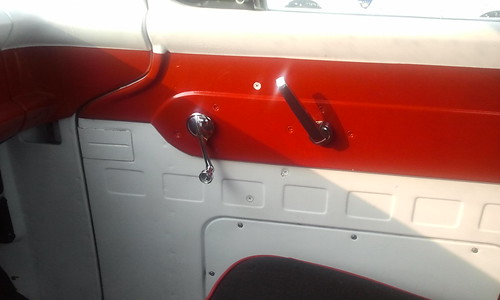
There are eleven screws holding the instrument panel and instrument cluster in place. The seven screws marked with blue arrows hold in the entire assembly. The four screws marked with yellow arrows hold the cluster to the panel.  Remove all eleven screws and carefully pull the panel away from the dash. The glass behind the panel will also be loose, so be careful not to let it drop and break.  Set the panel aside, but you can leave the cluster in the dash.  Just move it over to the right to give yourself enough room to work on the pivot.


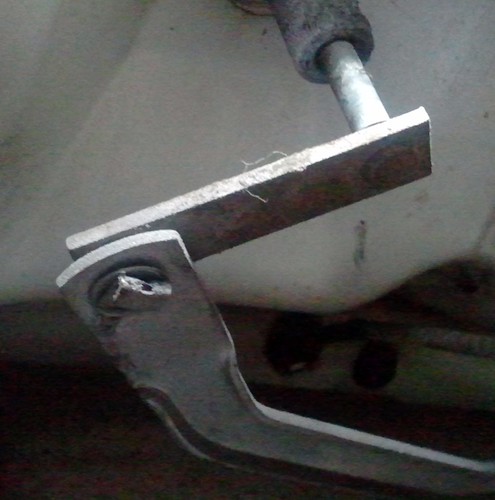
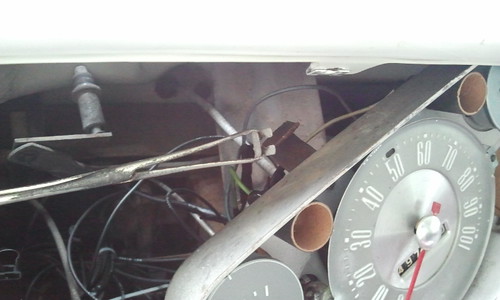
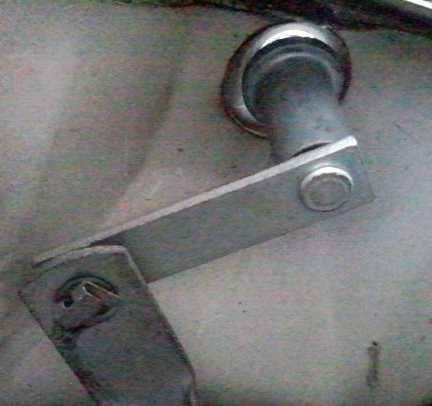
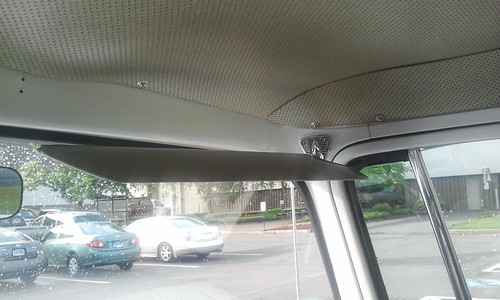
The pivot arm is shown in the photo above, marked by a yellow arrow.  It's attached to the actuator arm with a spring clip. You won't be able to remove it with your fingers, and I found needle-nosed pliers to be too clumsy inside the dash, so I used a pair of locking forceps to grab onto the clip and carefully pull it free.

Keep the clip, you'll need it when you install the new pivot.  Also, when you take the old pivot out there will be a thin steel washer between the arm on the pivot and the actuator. Keep that washer for the new one, too; it will save you having to run out and find a new one.

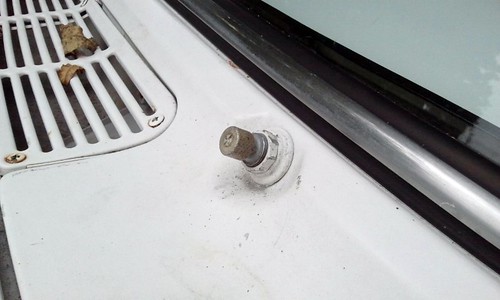
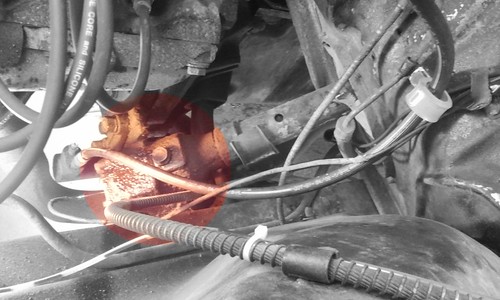
Take the old pivot out and look at the hole in the cowling where the new pivot will go.  See that keyway at the bottom of the hole? Remember it.

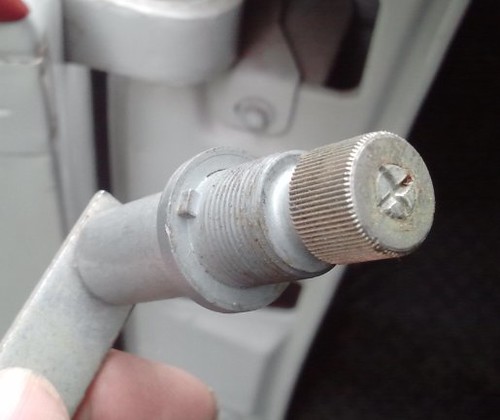
The new pivot has a raised rectangular key that lines up with the keyway in that hole. That holds the pivot steady while the shaft inside rotates and makes the wiper work.

Attach the new pivot to the actuator arm. Remember to put the thin steel washer between the pivot arm and the actuator.  Press the retainer clip onto the pin to hold everything together, then put the spline end of the pivot out the hole in the cowling, lining up the key with the keyway for proper fit.


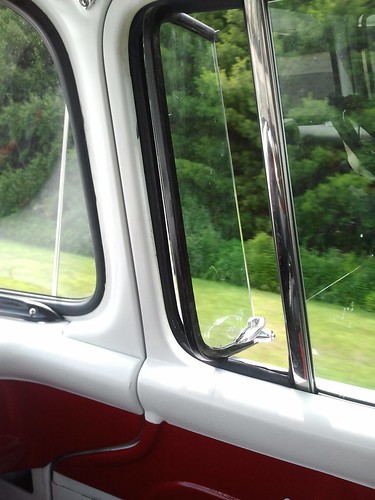
Replace the bezel and retaining nut to hold the pivot in place through the cowling.  Turn on your wipers to make sure the pivot is working correctly (the spline will move back and forth.)

To finish up, replace the instrument cluster and panel, and you're ready to replace the wiper arm and blade.

Done.

Sunday, August 14, 2011

Elks Club Car Show - Aug 13 2011


The Elks Club in Enfield held their annual car show / fundraiser yesterday. The weather was perfect - sunny and dry, and not too hot (rare for August!) Local business had been generous in their sponsorships, donating tons of gift cards for raffle prizes.  Trophies would be awarded, and there was even a "driver's raffle." Thirty cars had preregistered for the event, and more were expected to arrive as "drive-ins."  No one was expecting a huge show, but since it was such a nice day and rain was expected Sunday (the day two other, much larger, shows were to run) anticipation was high that there would be an active show.

Thirteen cars showed up.  A handful of spectators came by. The show, which was intended to run until 3 that afternoon, sort of unraveled and broke up a little after 1.

With so many sponsored prizes and so few people there, winning the raffles was easy. Maryanne and I won several gift cards for local restaurants and a pair of movie passes. But I would have traded the prizes for more cars in attendance.

Thursday, July 28, 2011

Behind me


Awesome: Got a driver's side mirror from MAC yesterday. Installation took minutes, and that includes knocking the Bondo out of the original mounting slot in the door.

Not Awesome: The passenger side mirror is still on backorder.

Monday, July 4, 2011

Vent windows


It's 90 degrees today, and the '60 doesn't have air conditioning. But it does have vent windows.  Vents are the most bitchin' pieces of glass you can have in a truck, except maybe for a split rear window. Crack one of them open just a little, and the airstream sucks cigarette smoke out.  Shove them open all the way, and you've got a delicious breeze in the cab even at low speeds.  I still can't figure out why they quit putting vent windows in cars.

Sunday, June 26, 2011

The American Truck Historical Society Truck Show, Brooklyn CT

The family and I took the day off and went down to the Brooklyn CT Fairgrounds on Route 169 today for the annual American Truck Historical Society Truck Show and Flea Market.  Most of the trucks being shown are big rigs, but there were quite a few nice old pickups there as well (mostly Fords.) 


There were a few really nice 1960's F-series pickups, like this 1960 F250. 

It was a great day - sunny and warm and perfect for wandering around looking at nice old trucks and chatting with the owners.  There was a flea market/swap meet as well, around the edges of the show area, but unfortunately not too many vendors showed up and the ones that were there didn't have very much stuff for 60's vintage trucks. 

By next year, I should have the paint and exterior done on my truck, and I'll enter it to show it off.


I took about 40 pictures at the show of various trucks. I haven't labeled or edited many of them yet, but if you'd like to check them out, here's the link to the Flickr set: http://bit.ly/ATHS6-11


Sunday, June 19, 2011

Humping Furniture


There were two car shows this weekend - one on Saturday in Somers, the other Sunday in East Windsor.  I had planned to enter the Somers show - not in search of an award, but to meet and chat with other old gearheads.  Half the fun of a car show is talking with the car owners, comparing notes and making friends.  And I was hoping to get to the East Windsor show as a spectator to walk around and admire the hot rods and the carefully restored stockers.

It turned out that I didn't get to either of them.  I got some kind of bug Friday night which kept me off my feet all day Saturday. And Sunday the '60 and I hauled furniture all day, helping my stepdaughter move to a new apartment.

I haven't owned anything but quarter-ton 4-cylinder pickups for the past 15 years, and they have always been pretty well-matched to my light hauling needs.  But I have to say, it was pretty awesome having a full-sized truck to hump the furniture this weekend. The bed of the '60 is a full eight feet long and a little over 6 feet wide - I can lay a 4 x 8 sheet of plywood down between the wheel wells with room to spare on all sides - and we loaded the hell out of her.

Sunday, June 12, 2011

Steering Adjustment and Other Stuff.

Brought the '60 down to my brother-in-law Bob's place so he could give me a hand with the steering adjustment.  Bob is longtime mechanic with a special affinity for pre-70s cars and he's forgotten more about old cars than I'll ever learn.


Take a look at the photo above. That small area in color shows the steering box.  On Bob's '62 Galaxie, the preload adjustment screw is on the top of the box, but on the '60 F100, that bolt on top is a filler cap for gear oil.  When we took that cap off, we found that there wasn't any oil in there, so we filled it up.

The adjustment screw was on the side of the box toward the engine, in a really tight spot.  We were able to get to it, though, with a 3/4-inch box wrench (to loosen the locknut) and an offset screwdriver (to turn the adjustment screw.)  It was a pain in the ass, but we managed to take quite a bit of play out of the steering.  That was the good news.  The bad news was that the gears in the steering box are showing a lot of wear.  I'll be able to keep adjusting them for awhile, but sooner or later I'm going to need to put in a new or rebuilt box.

While I was under the truck, I inspected the speedometer gear in the transmission. Good news and bad there, too. The gear is brand new and in perfect condition, but that just means that the problem with the speedometer is probably in the instrument cluster.  There's more work to be done there.

And the gas gauge isn't working because there's no voltage going to the sending unit in the tank. The wiring under the dash is a bird's nest of black wires, all bundled tightly up with plastic cable ties. Sometime this week I'm going to try to crawl under there, cut the cable ties, and trace out the wires to see exactly why some electrical things are working and some aren't.

Friday, June 10, 2011

Vehicle Overview - Part 1: Interior

With so little work needed on the outside of the truck, I thought that the interior of the cab would be a good place to start documenting what the '60 looks like right now, before any changes get made.

The driver's door looks good, with the original red driver's armrest (available as an option in 1960.)  The door handle and the window crank are both original.

The door latch mechanism and the window assembly are going to need some attention. The door opens "hard" and the window is mighty tough to roll up (though it glides down smoothly.)


Meanwhile, over on the passenger side, we have no arm rest (that's a driver's side only feature,) the original door handle, and some random window handle.

The window on this side operates better than the one on the driver's side, but the door lock is malfunctioning - the door locks just fine, but the key won't open the door from outside (the key turns, but the door won't unlock.)

That's a new headliner, but I don't think that original headliners in the '60 F100s were perforated. I'll probably leave it for now, but replace it later with a one-piece molded headliner for more epic looks, which fits with my "Custom Stock" overall plan for the truck.

The visors and brackets are repro, but they're good repro - correct for the year and model. At the least, I want to dye them red to match the interior color scheme.

 Two problems with the dome light:  The previous owner warned me that he did something wrong while wiring it and now it stays on all the time. The other problem is the lack of a lens. I'll have to trace out the wire to find the first problem.  There are plenty of places online where I can get the lens.


The dash is in exceptionally good shape, but does need some detailing.  The only thing that seems to be working in the instrument cluster is the idiot light for the oil pressure.  Everything else is either non-functional or malfunctioning. The idiot light for the generator is out, the speedometer has, I believe, a broken tooth preventing it from being accurate.

Knobs and switches from left to right:
  1. Headlights/Panel dimmer 
  2. Windshield wiper control - this knob is not correct
  3. Left side floor vent control
  4. Heater fan control
  5. Choke - this knob is not correct and is missing the bezel
  6. Right side floor vent control - not currently operating
  7. Cigarette lighter (it works!)
Under the dash are the aftermarket gauges - Oil pressure, water temperature, amps. I'll probably leave those in even after I get the cluster working again.


    Thursday, June 9, 2011

    Regged and On The Road

    I'm not sure any state agency in Connecticut is more disliked than the Department of Motor Vehicles. The lines are often long, and I'm always hearing complaints about surly employees, horrendous wait times, finally getting to an examiner's window only to find that you need this or that additional form or document - the list of grievances goes on and on.

    Even though I usually don't have too many problems at the DMV, I decided on Wednesday to get there early and just get the registration process over with.  I had all the necessary paperwork ready - completed Bill of Sale, insurance card, and the application form (which I had picked up earlier in the week so I wouldn't have to waste time filling it out there.)  It was hot and humid that day, even at 8 in the morning when I got there, and the DMV is air-conditioned so I didn't really care how long I would have to wait - at least I'd be comfortable while waiting.

    As it turned out, though, I was only the 8th person in line. The examiners were all friendly and helpful, and I was out of there by 8:30, licence plates for the '60 in hand.

    May you always be this awesome, DMV.

    Wednesday, June 8, 2011

    It's Home!

    She looks pretty good in the driveway.
     I drove down to Waterbury CT (about 50 miles south) to get the truck last night, and drove it home. Waterbury is a hilly town and I was glad for the granny gears in 1st and 2nd as I cautiously drove out from the neighborhood where it was located to the highway.
    The very first thing that I'm going to need to work on is the steering. It's really sloppy. Online forums call it "drunken monkey" steering, but I referred to it last night as "pants-shittingly loose." There are a few other minor details, but they're not nearly as important.

    As far as other major systems go, there aren't really any problems. The engine is a Ford 360 V8 which runs beautifully, the clutch is silky smooth, and the tranny is fine. The tires are good, and the brakes are fine too, though they're drums all around and that is going to take me a little bit to get used to because every car I've driven for the past 20 years has had disc brakes.  

    I'm off to the DMV this morning to get the registration. Later this evening I'll post some more pictures including some interior shots, and a list of the stuff I want to do to her. As my brother-in-law Jim said, "This truck is a blank canvas - everything's here and everything's solid, and there are so many possibilities."

    Sunday, June 5, 2011

    First Look

    I've been shopping for a truck for quite a while, ever since I discovered that my dependable '92 Nissan has such extensive rot in the frame that I can see daylight through it.  My search hasn't been all that intensive; it's been almost two years since I realized that the Nissan's frame wasn't repairable. But I've been keeping my eyes open for an inexpensive replacement.

    When my wife Maryanne and I started talking about getting another truck, I told her I wasn't looking for anything big.  Quarter-ton 4 cylinder trucks have served me well over the past ten years, and I really don't have the need for a massive eight-cylinder, 4-door, 1-ton behemoth. The only exception to that, I told her, was if I could find a pre-1970 F-series Ford.


    On Saturday 4 June, we went to the EJK Car Show at Xavier High School in Middletown.  My brother-in-law Bob had two cars he wanted to exhibit , and I offered to drive one of them to the show.  He drove his 1934 Ford Rat Rod (on the left in the photo above,) and I piloted his 1962 Galaxie 500 (on the right.)

    As we walked around the show, chatting with car owners and enjoying the perfect weather, we came across this beautiful 1960 F-100:


    Having come from Nevada, there isn't a bit of rust on it. The body is all sound, all metal, and all original.  Maryanne and I took some time to think about it, and I called the owner on Saturday night.  It's coming home with me on Tuesday.